Web Pages Site Menu Navigation
Your site menu is an area across all pages of your website which shows links to direct visitors to different pages. You might know it as a "navbar," "footer," "navigation area," or "header," and in Heights it is located at the very top (menu) and very bottom (footer) of each page you create on your site.
The site menu cannot be created from the page editor. To create your menu, select Web Pages from the main vertical menu on the Creator Dashboard. Then open your site navigation area and click Edit Site Menu or Edit Site Footer.
The Site Menu is the top area of your website, which contains your logo and a few important links. The Site Footer is the very bottom area of your website, typically larger than the menu, and it can contain your logo, your business information, links to different areas of your site, and links to your Terms, Privacy, and Imprint pages.
On Heights, you can customize which links to add to the menu and the footer by clicking on Edit Site Menu or Edit Site Footer.
Edit Site Menu
If you have not created any pages on your site yet, by clicking on Edit Site Menu you will typically see the following built-in items:
- A Home Page Link: Leave it unchecked if you wish to only show your logo or program name as a homepage navigation link.
- Log-in: you can choose to display this link or hide it from the menu by checking Hide. This is where existing students can log into your program.
- Sign-up: you can choose to display this link or hide it from the menu by checking Hide. This is where new students can enroll in your program.

To add more links to your top menu, click + New Menu Item. This will generate an additional line where you can type the name of this link (as it will appear on the site) and choose what it should link to.
You can add the following links to your site menu:
- Site Page: link to another existing page on your site.
- Offer: link to an existing offer in your program. You can choose whether to link to the preview page or the checkout page.
- Course: link to an existing course in your program. You can choose whether to link to the preview page or the checkout page.
- Digital Product: link to an existing digital product in your program. You can choose whether to link to the preview page or the checkout page.
- Blog: link to your blog area.
- Community: link to your community area.
- Custom: add an external or custom URL.
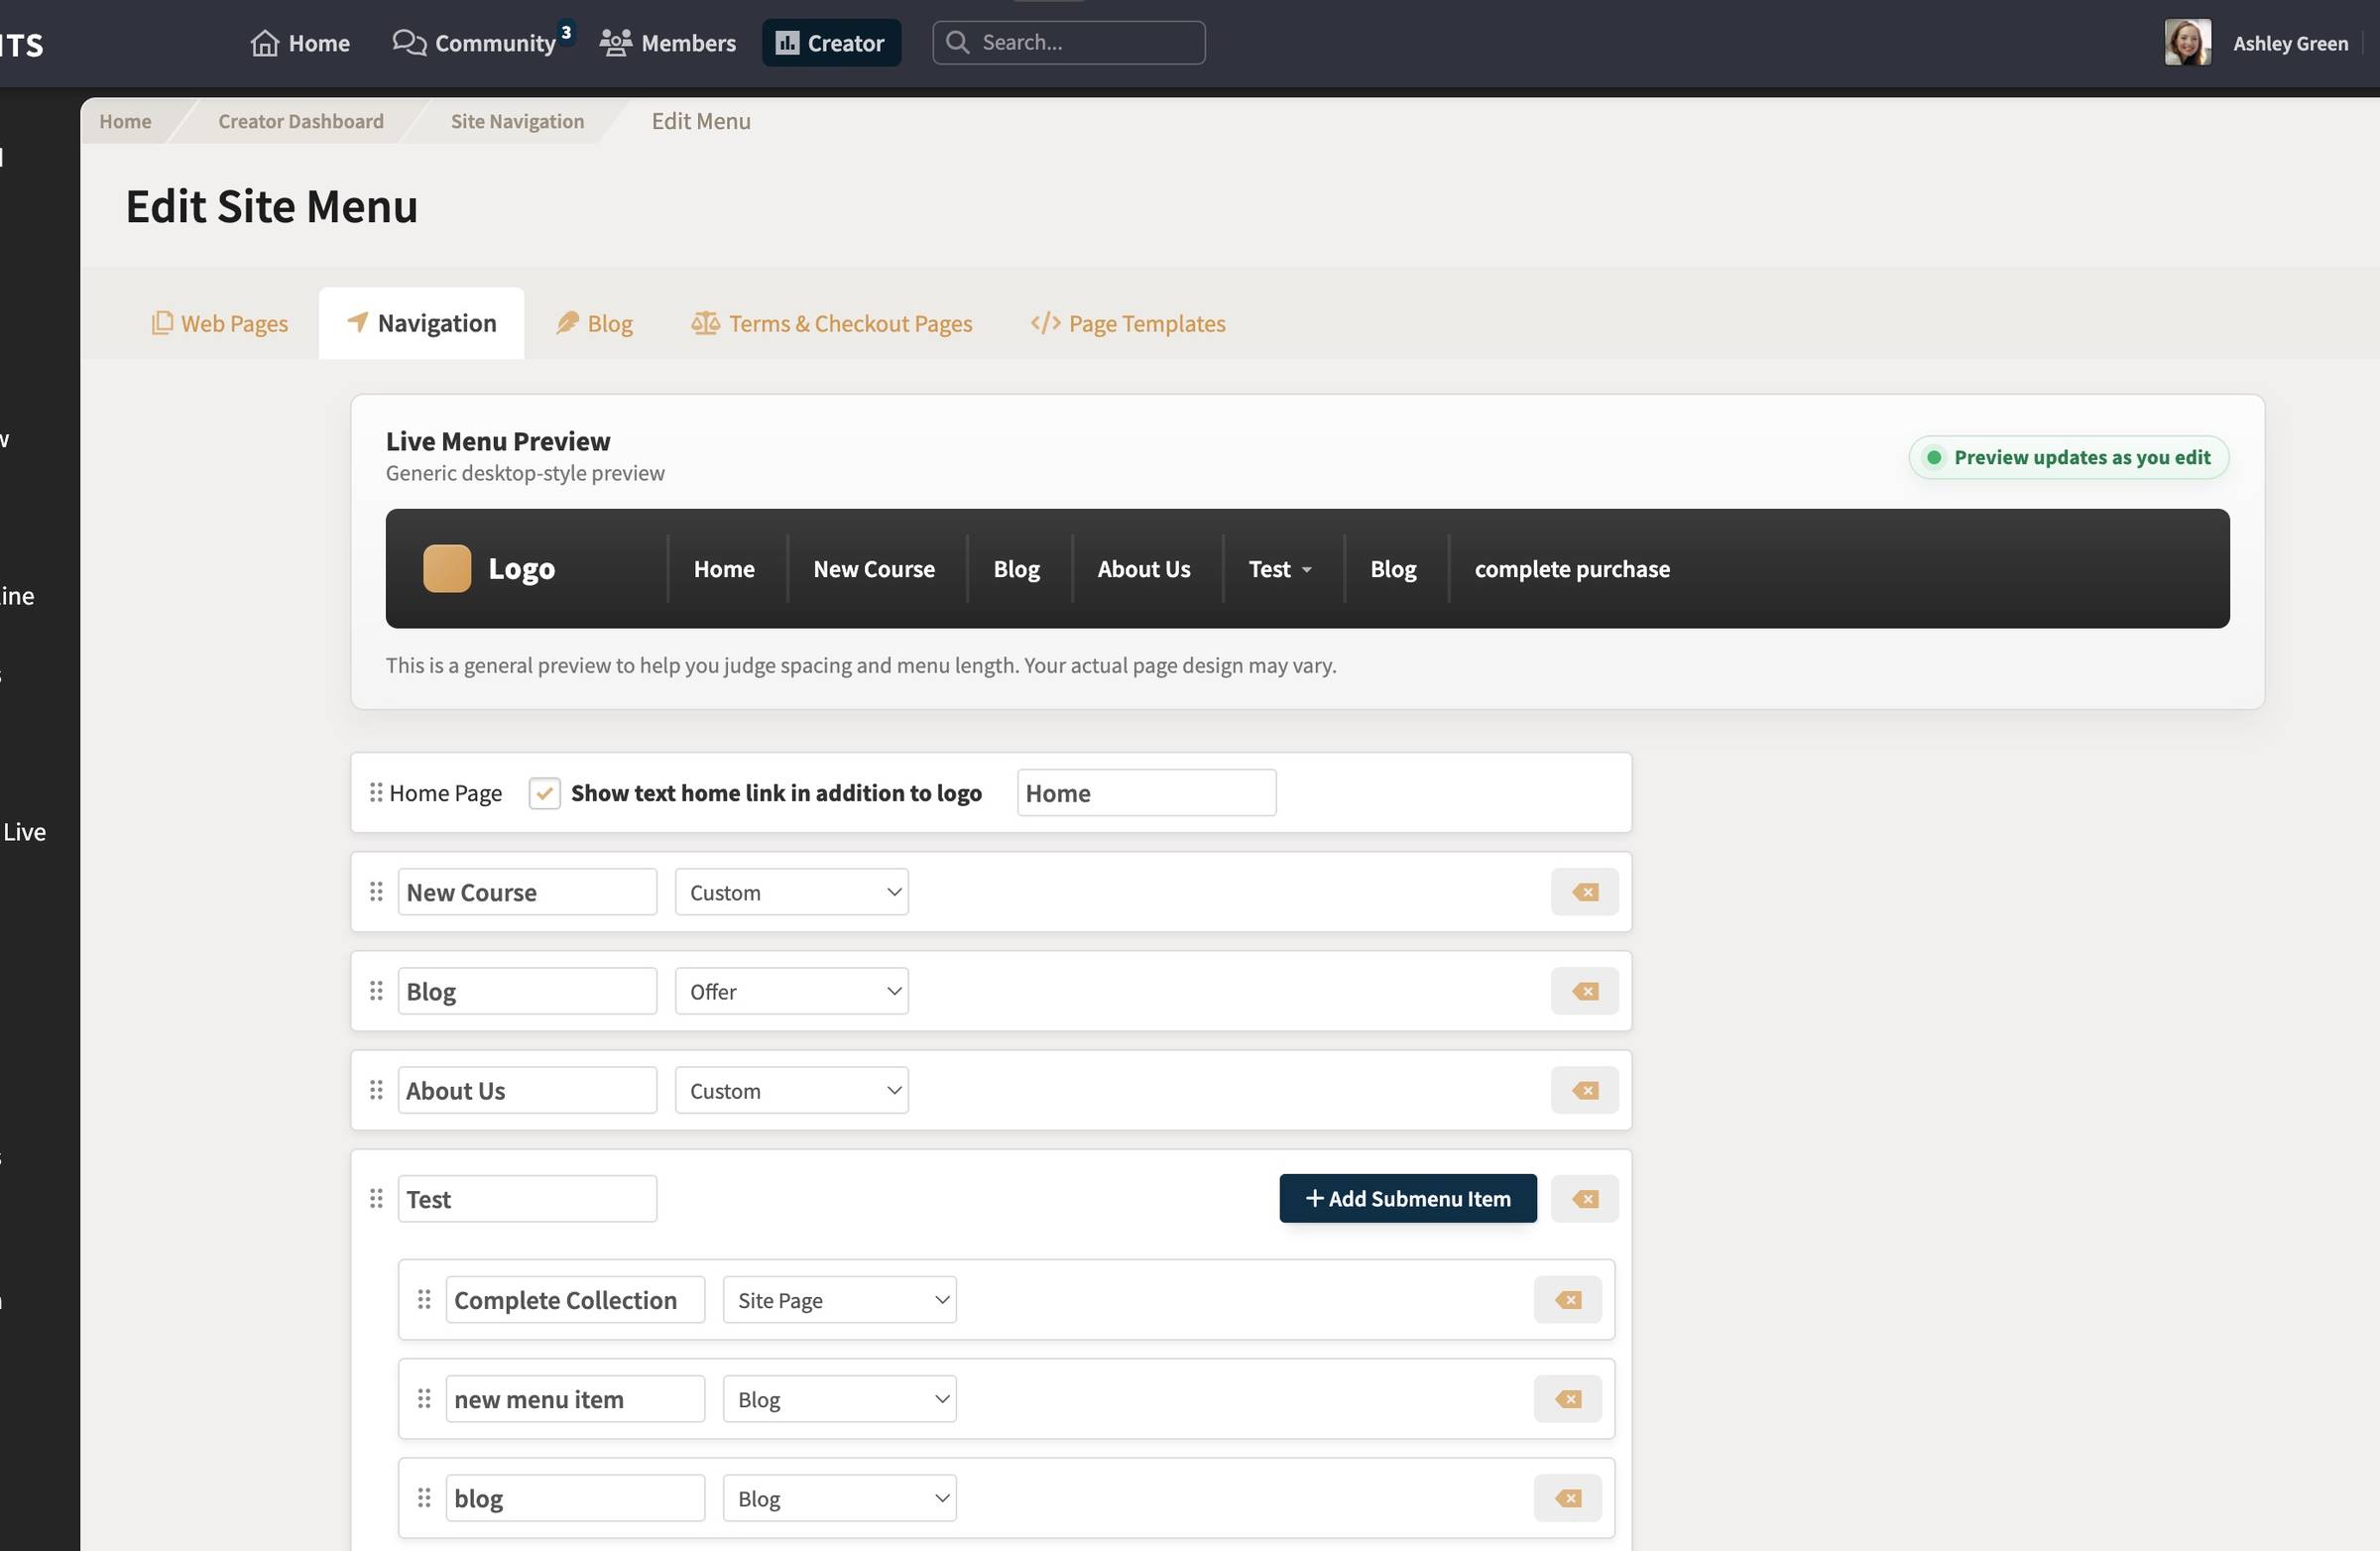
How to create a submenu
Heights also supports submenus in your site menu and footer.
- Click + New Submenu to create a dropdown parent item.
- Enter the text you want visitors to see for that submenu, such as Products, Resources, or Learn.
- Then click Add Submenu Item on that submenu row to add the links that should appear inside it.
- Each submenu item works like a regular menu link, so you can choose a link type such as Site Page, Offer, Course, Digital Product, Blog, Community, or Custom.
Important: a submenu parent is only a text label that opens the dropdown. It does not have its own link type or URL. Regular menu items also cannot contain nested submenus. Only submenu rows created with + New Submenu can contain submenu items.
To change the order of the links in your site menu, you can drag and drop the rows by clicking on the 6-dot handle on the left and positioning the links as you like. You can also drag submenu items within their submenu group.


Edit Footer Menu
The site footer works in a similar way to the site menu, but footer links are kept as regular links only. To add footer links, click + New Menu Item.
You can also choose between two footer layout styles:
- Smaller single-row footer: links appear in a single grouped row on the left side of the footer.
- Larger multi-column footer: links flow into multiple columns for a more expanded webpage-style footer.
Heights also includes a live footer preview in the footer editor so you can judge spacing, copyright text, and how your links will line up in each layout style.
If you choose the larger multi-column footer, the editor will also show separate visual sections for Column 1, Column 2, and Column 3. You can drag footer links into those sections to decide exactly which links appear in each column.
Terms, Privacy, and Imprint links will display automatically if you add content to them in the Terms & Checkout Pages area.

Style the Site Menu and Footer
To change the visual appeal of the site menu and footer, you need to head over to the Web Page Builder page editor. Here you can change the color and font used in the footer by clicking on it and editing it in the Open Style Menu.