Certificates
Heights offers creators a built-in certificate designer on all plans. Certificates can be manually issued to learners, or they can be automatically awarded after a student completes the product you connect to that certificate template.
To create a certificate, go to Awards from your Creator Dashboard and open the Certificates tab.

There you will see any certificate templates you have already created. If this is your first certificate, the list will be empty until you create your first template.
To create a new certificate, click + New Certificate Template. You will be taken to the certificate designer where you can choose a theme and customize the colors, fonts, text, and settings for that certificate.
Designing a certificate template
Inside the certificate designer, you can switch between available base themes and then return to the design tab to customize the look of your certificate.
To switch the base template of your certificate, click on the tab "Themes" as shown below, and pick the design you want:

Once you have chosen the design you prefer, switch back to the "Design" Tab to customize the colors and fonts of your certificate.
In the "Design" Tab, you can also decide on the settings for your certificate. By default a certificate will only be generated when you manually grant it to the student. If you'd like to automatically issue a certificate upon the completion of a specific course, select the course or product from the dropdown at the end of the page.
Once a certificate template is created, you can always come back and edit its design and settings later.
Issuing a certificate to one student
When you open a certificate template, you can search for a student by name or email and issue that certificate directly to the selected student.
This is useful when you want to grant a certificate manually outside of an automatic completion rule.
Here is what a student will see once a certificate is granted to them:

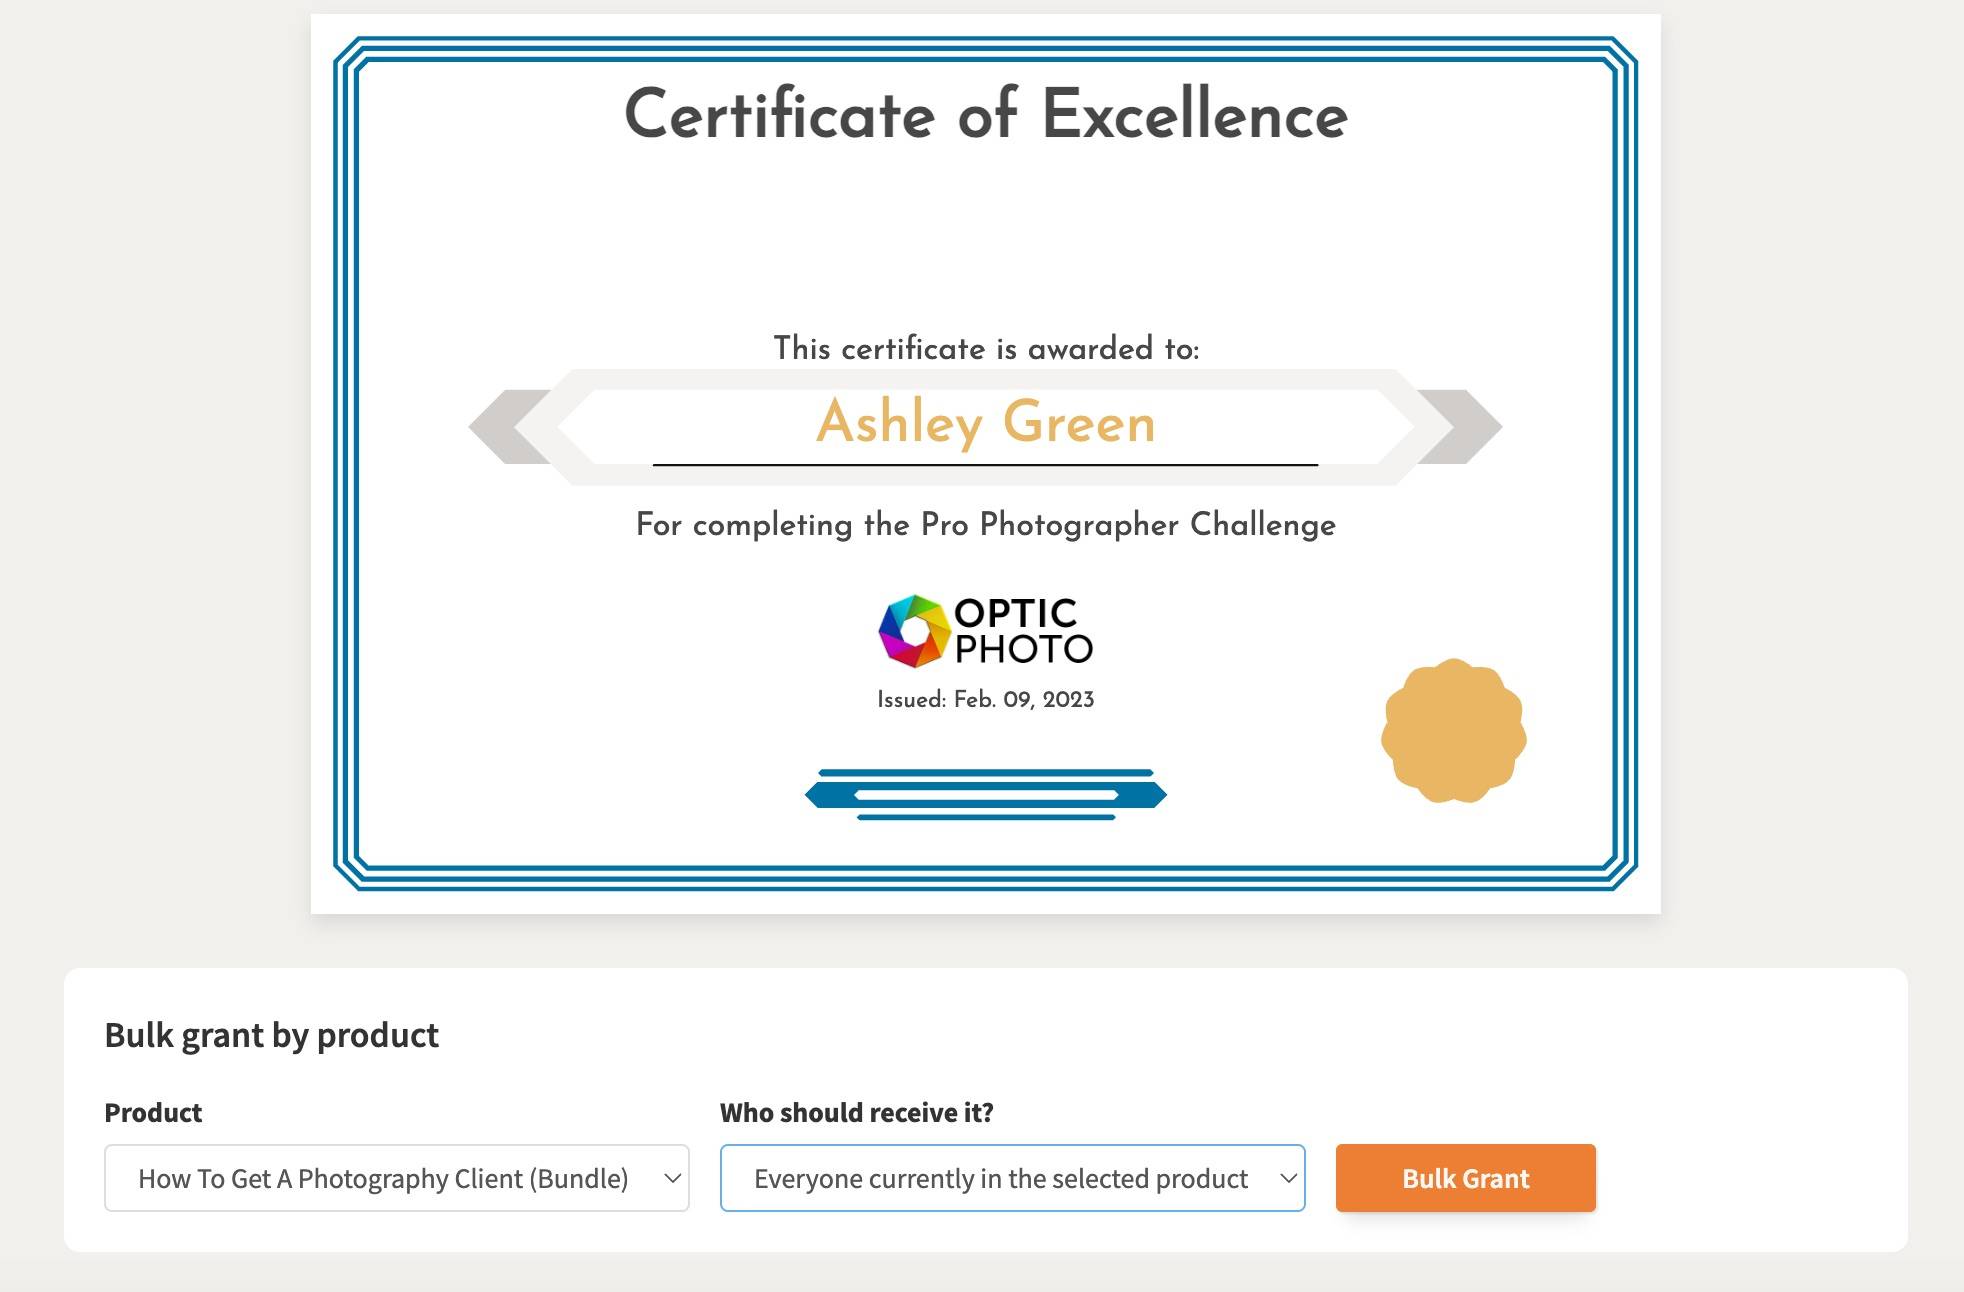
Bulk granting certificates by product
Academy plan creators also have access to a Bulk grant by product option on the certificate template page.
This allows you to select a course, offer, or digital product and issue the certificate in bulk to learners currently enrolled in that product.
You can choose between:
- Everyone currently in the selected product
- Only users who have not received a certificate for that product before
This is especially helpful when you are launching certificates after a product has already been running and want to award existing learners all at once.
What students see
Students can view their certificates from the Certificates area on their profile page. From an individual certificate page, they can view it, print it or save it as a PDF, and use its public share link when available.